

Launch CR HD V2 New Generation Heavy-duty Truck Tool Standard Configuration Supports J1708/ J1939/ J1979/ J1850/ PWM and VPW Protocols
Buy Now: £70
15th Anniversary Special Offer!
Sept. 30 – Oct. 30
Over 300 GBP Get Free Godiag J2534 (SP421-B)
Over 600 GBP Get Free Vgate vLinker (SP392)
Over 1000 GBP Get Free Godiag GT100 (SO537)
LAUNCH X-431 Anni Sales Gift
Over 799 GBP Get Free VSP-600 (SO598)
Over 999 GBP Get Free BST-360 (AD185)
Over 1199 GBP Get Free IMMO Plus Key (SK413-F)
Whatsapp +86 13983755934
Sept. 30 – Oct. 30
Over 300 GBP Get Free Godiag J2534 (SP421-B)
Over 600 GBP Get Free Vgate vLinker (SP392)
Over 1000 GBP Get Free Godiag GT100 (SO537)
LAUNCH X-431 Anni Sales Gift
Over 799 GBP Get Free VSP-600 (SO598)
Over 999 GBP Get Free BST-360 (AD185)
Over 1199 GBP Get Free IMMO Plus Key (SK413-F)
Whatsapp +86 13983755934
Shipping:
Free Shipping
Standard Flat Rate Shipping ServiceEstimated delivery time: 7-15 working days.See details »
Returns:
Return for refund within 30 days,buyer pays return shipping. Read details »
Product Description
Launch CR HD V2 is a next-gen heavy-duty truck tool for DIY users, supporting HD OBD/EOBD, fast diagnostics, live data, graphs, voltage checks, and more. It covers J1708/J1939/J1979 and offers free lifetime upgrades.
Launch CR HD V2 Heavy-duty Truck Tool
Launch CR HD V2 Description:
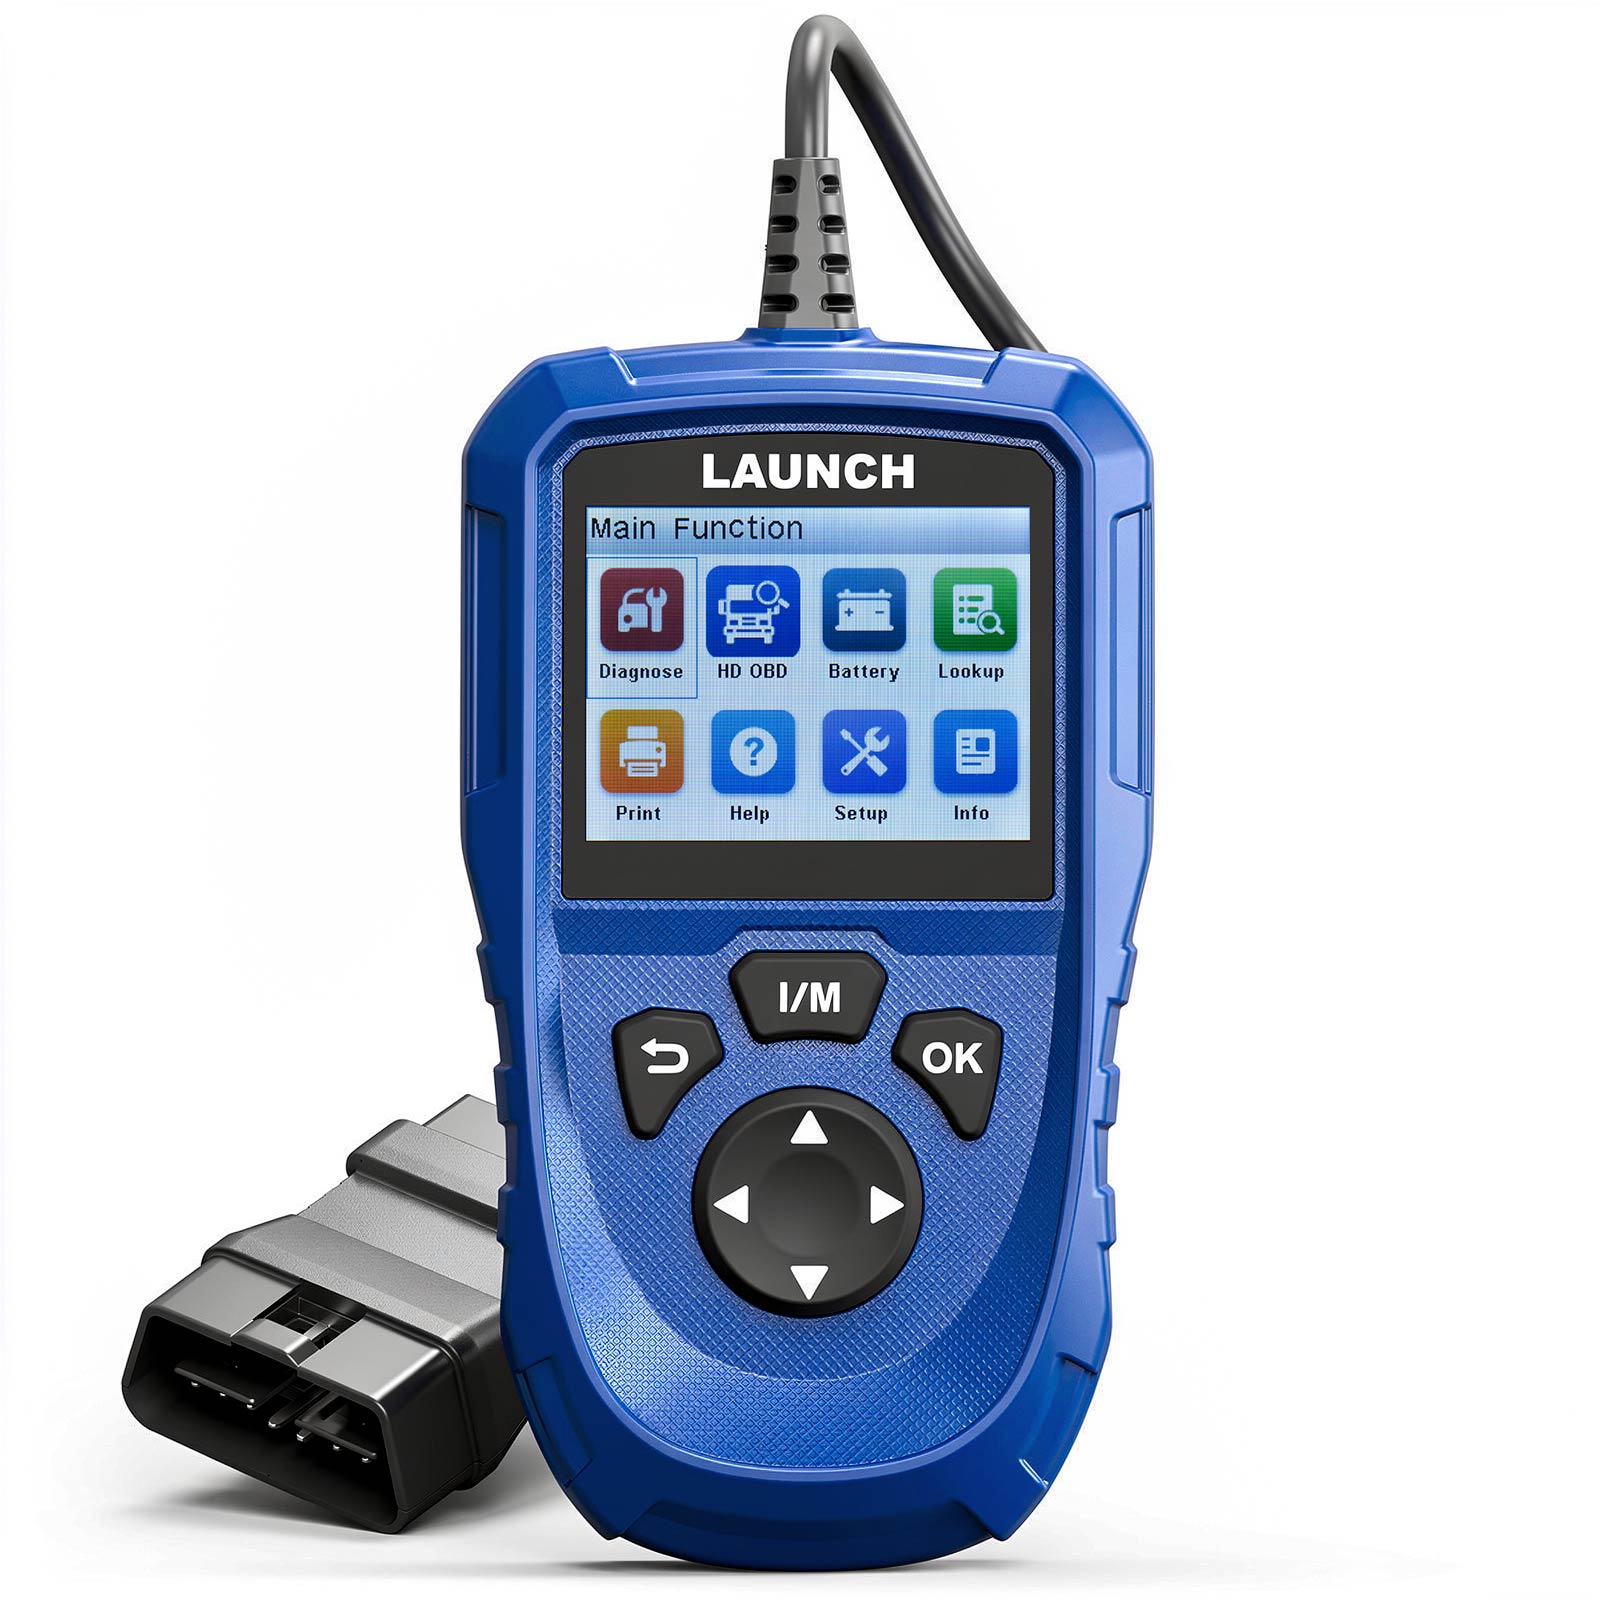
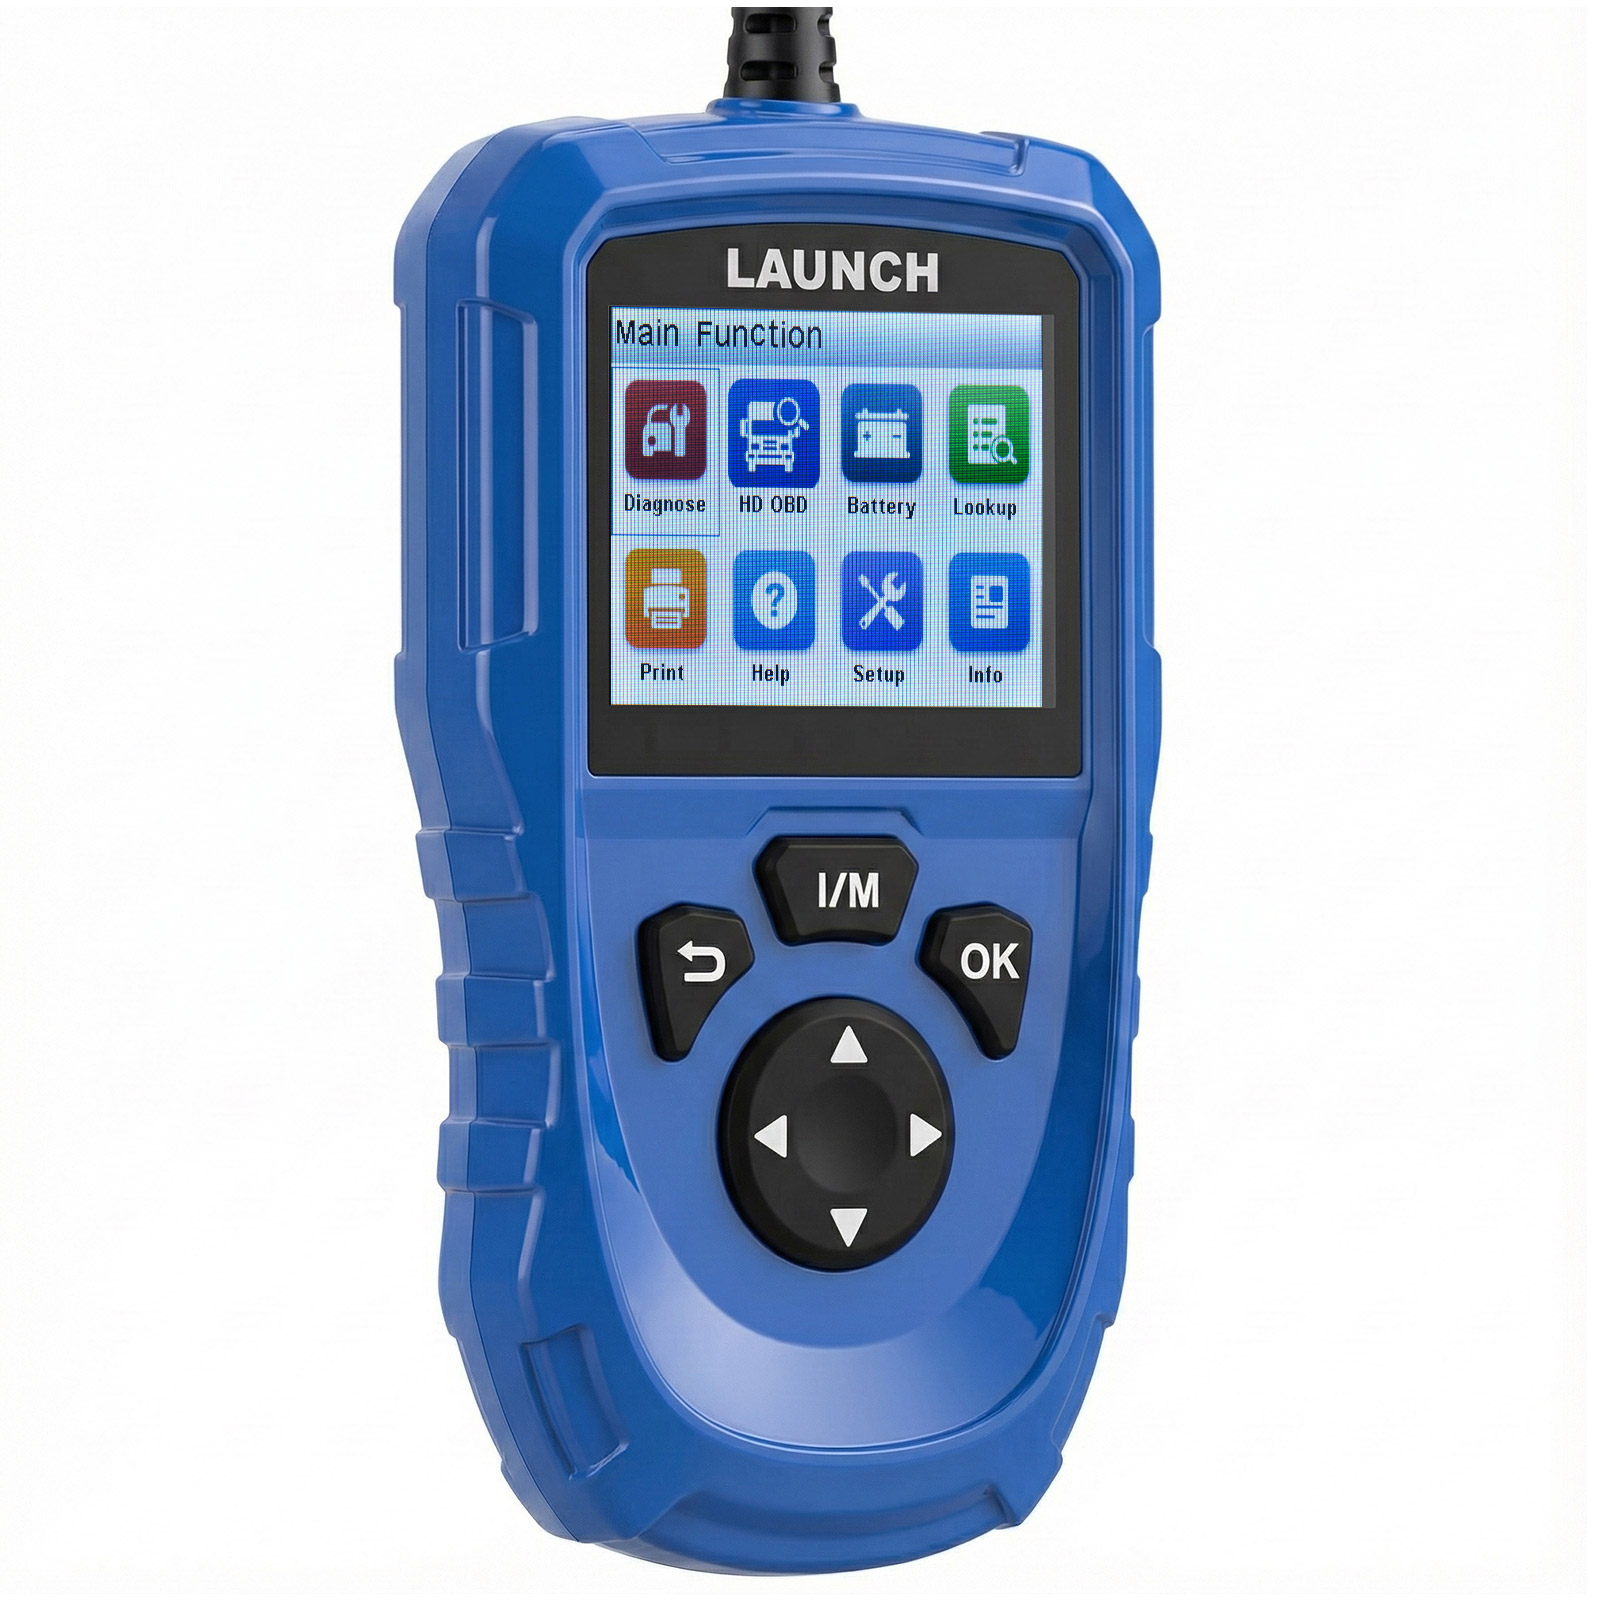
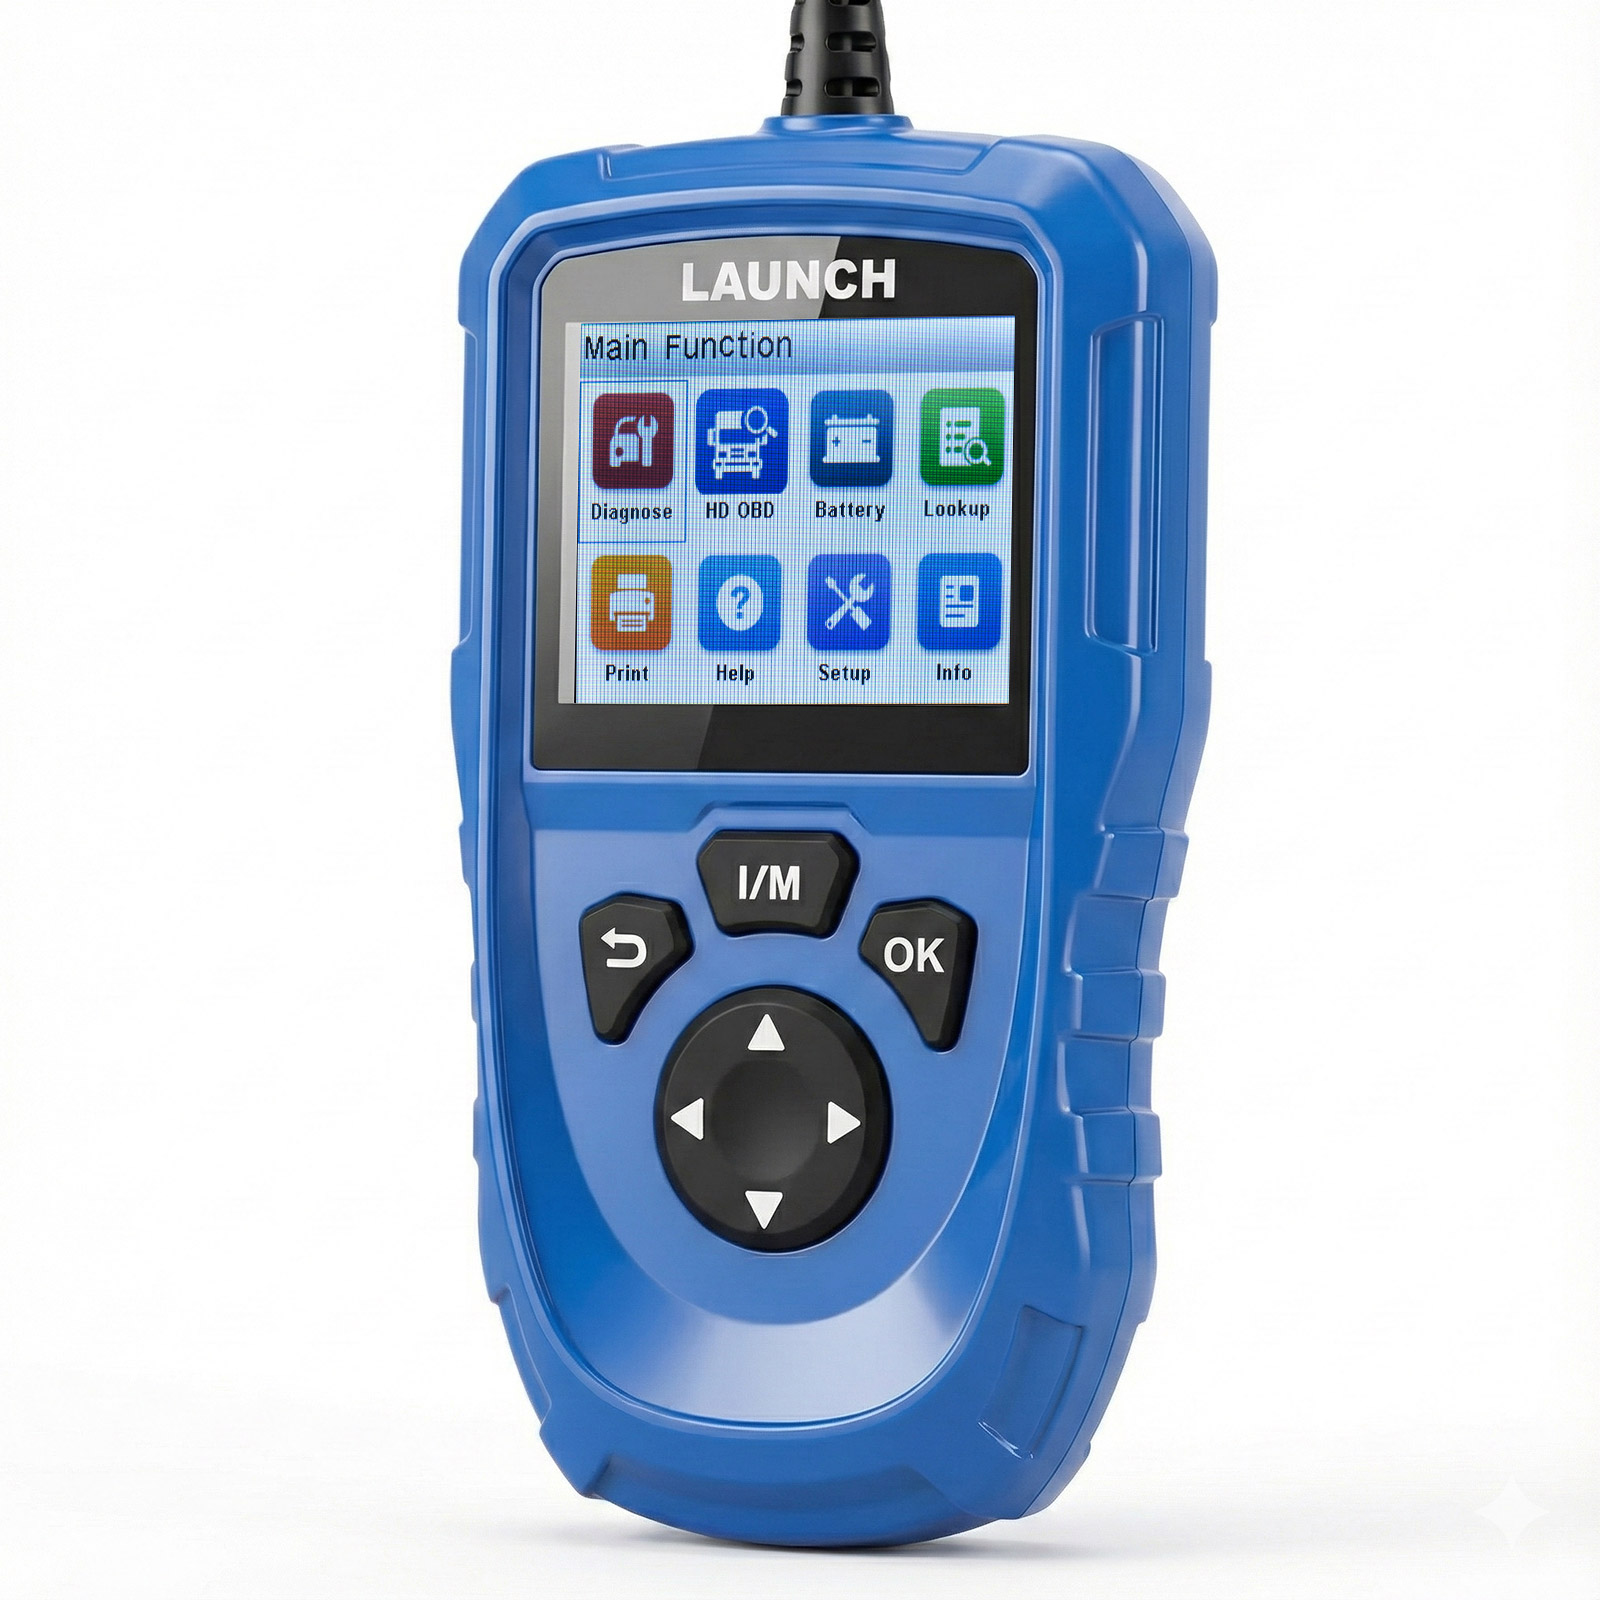
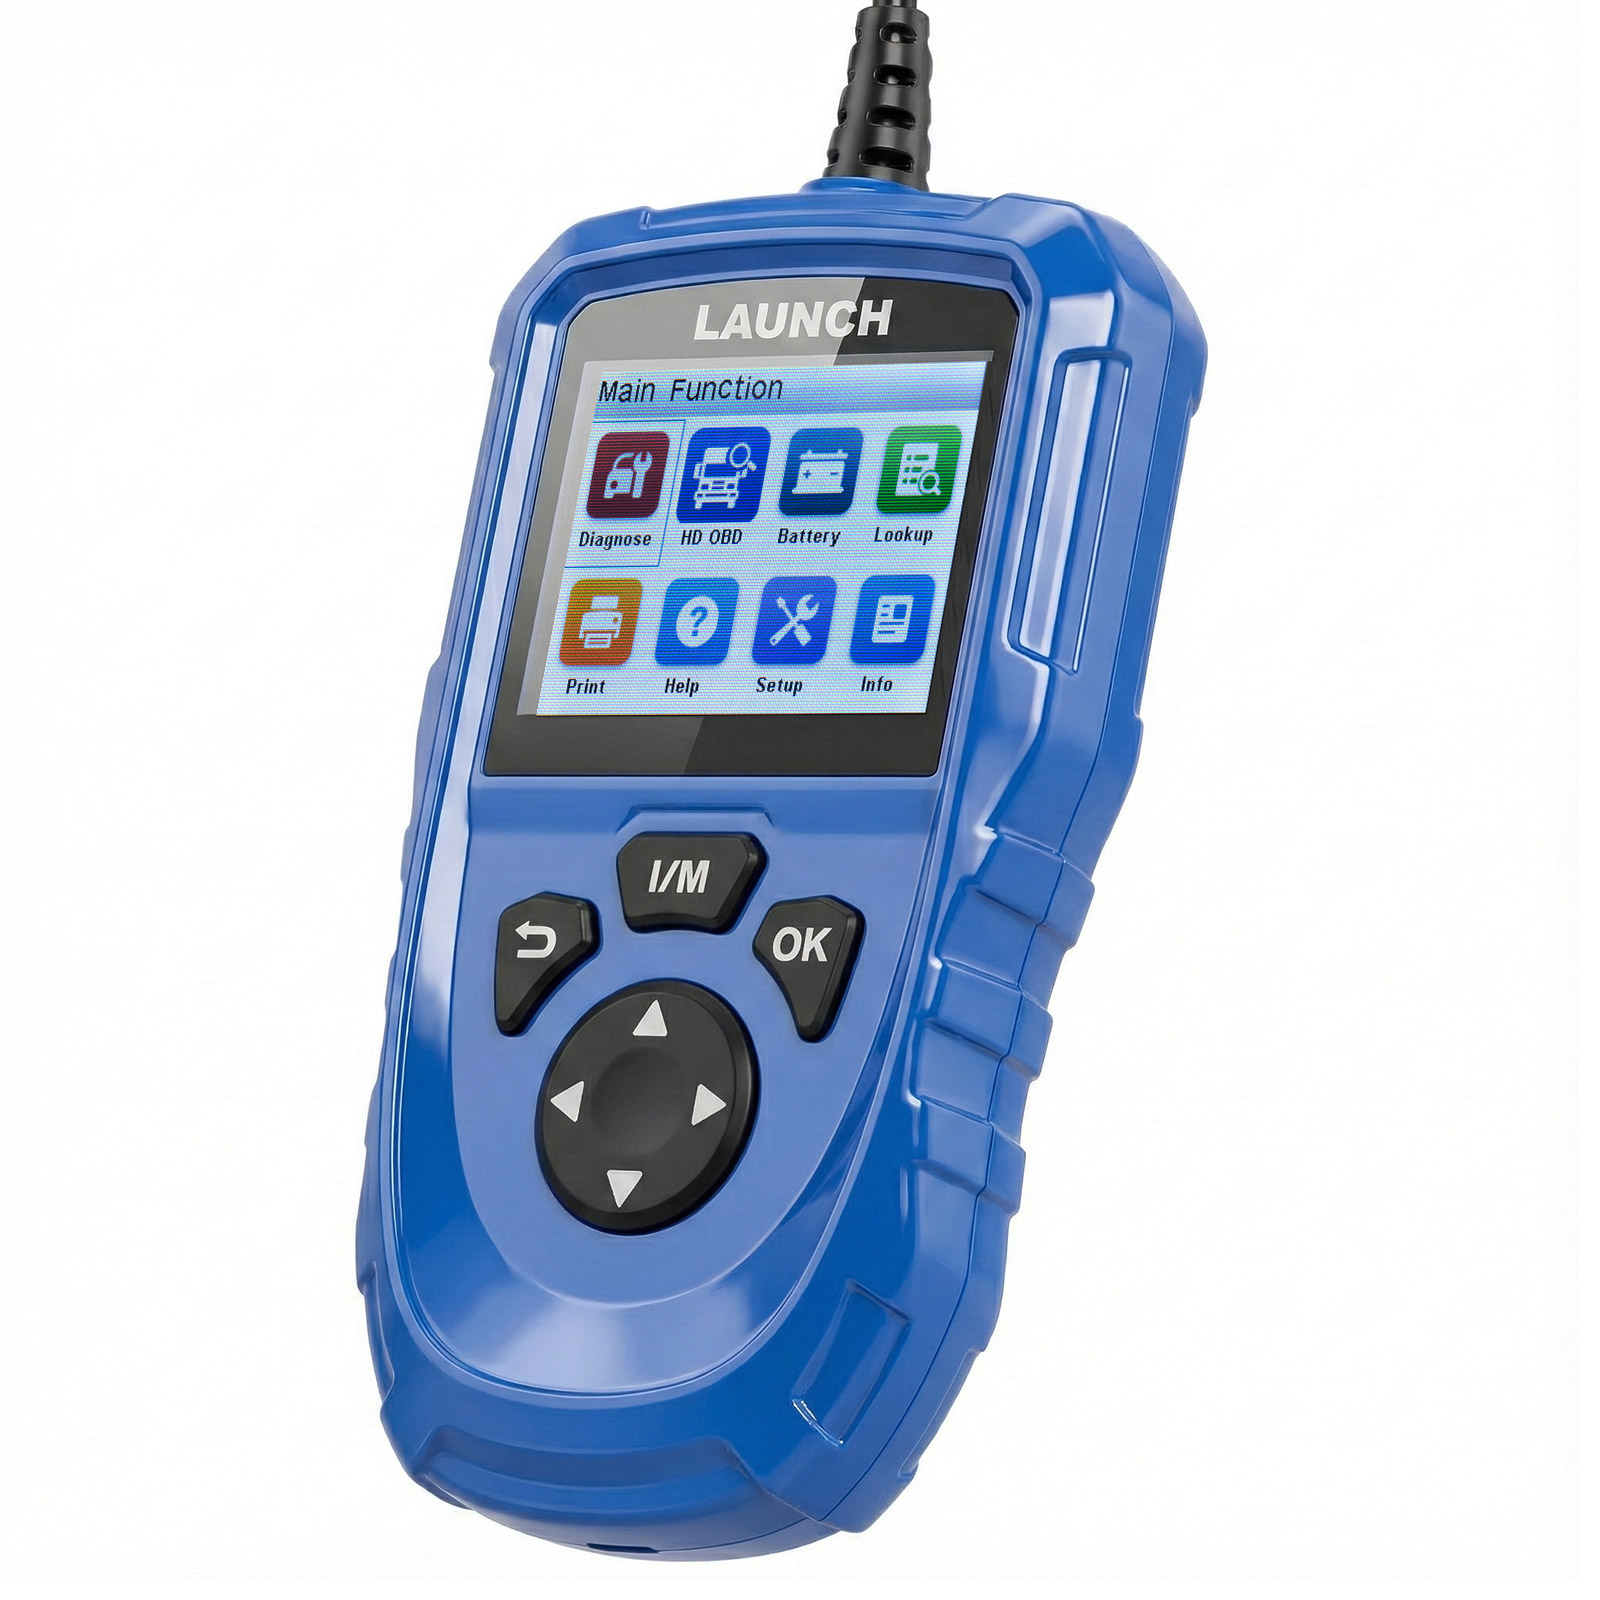
Launch CR HD V2 is a new generation heavy-duty truck tool, developed based on the ARM platform and designed specifically for DIY users. This product supports HD OBD and EOBD, and features practical functions such as fast fault code reading and clearing, real-time data stream display, graphical display, voltage detection, data printing, and I/M readiness status checking, meeting the needs of various scenarios, including daily maintenance and troubleshooting.
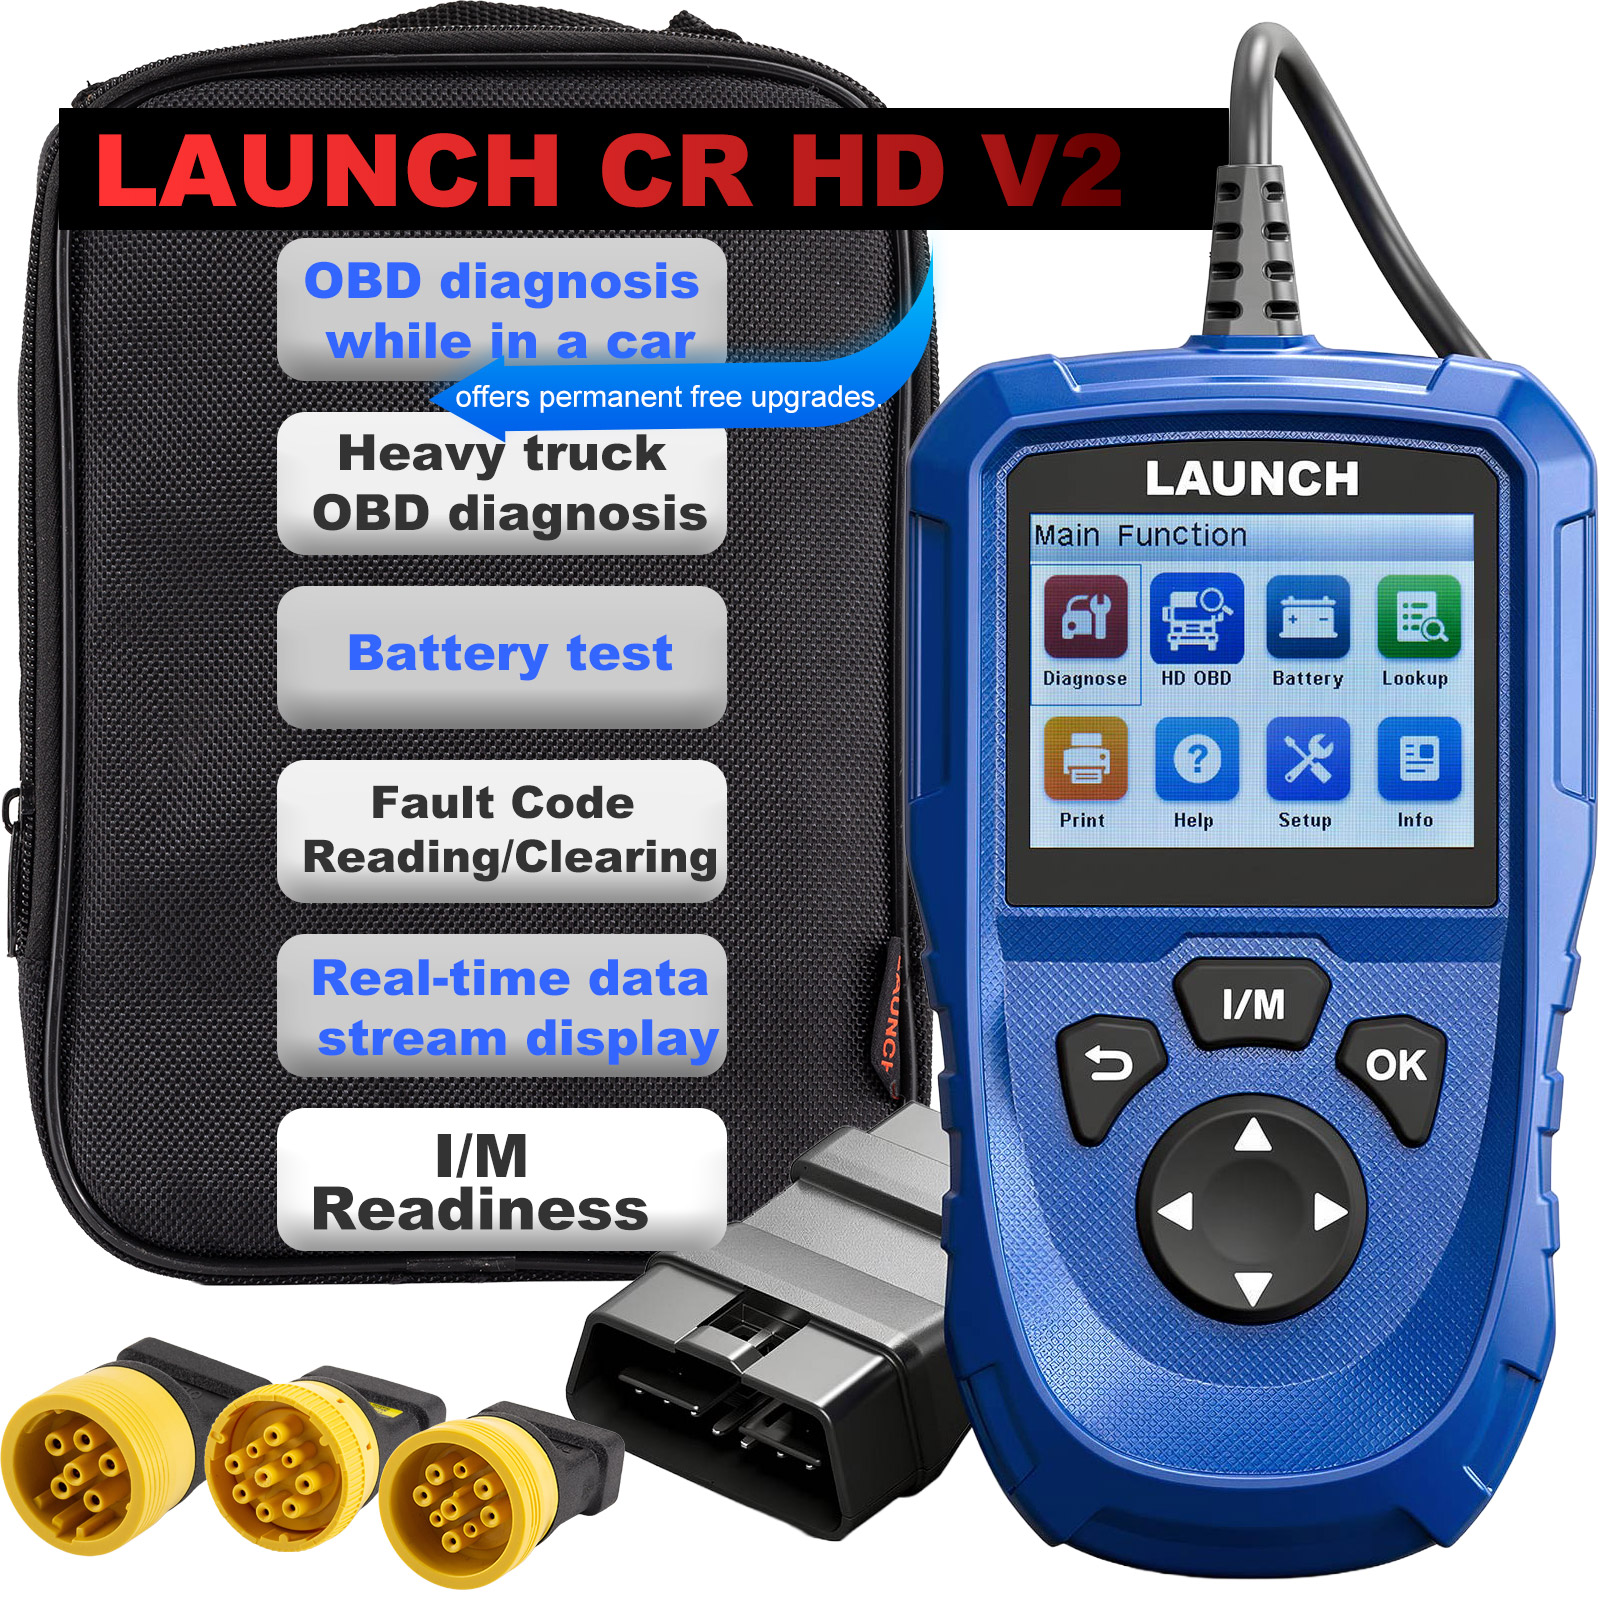
Launch CR HD V2 supports J1708, J1939, J1979, J1850, PWM, and VPW protocols. It offers comprehensive fault code and data stream display, and offers permanent free upgrades.
Download and update the Launch CR HD V2 software. Please refer to the link below:
https://www.obd2shop.co.uk/service/launch-cr-hd-v2-software-download-update.html
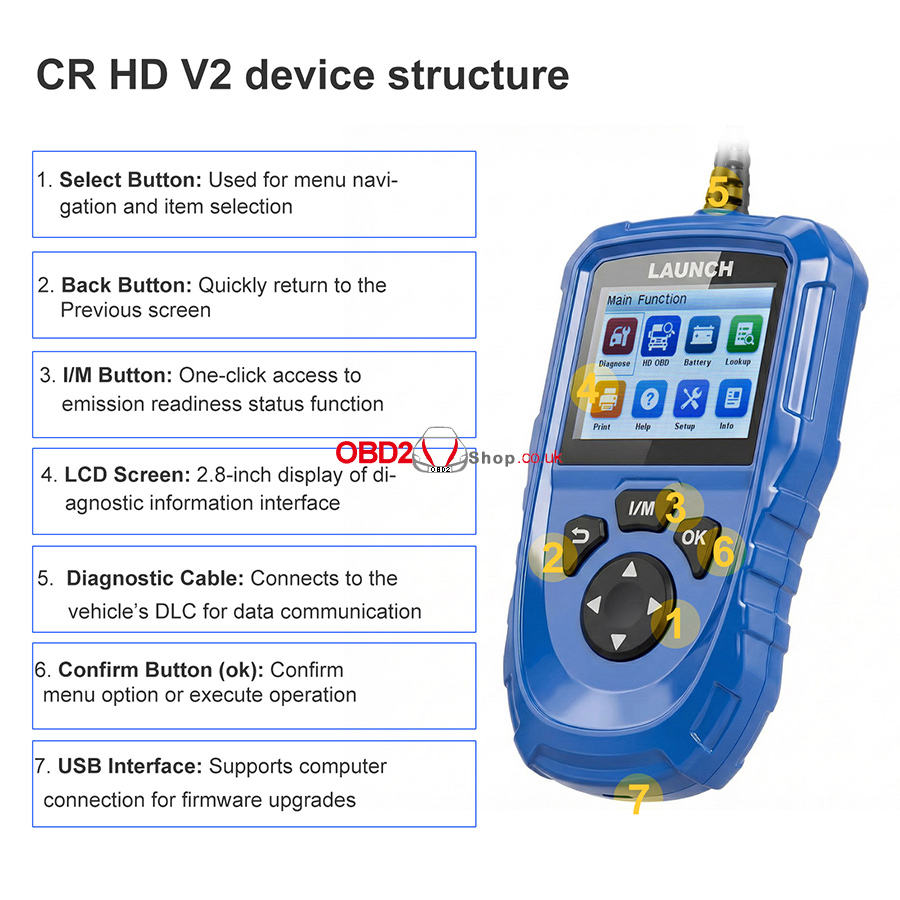
Launch CR HD V2 Functions:
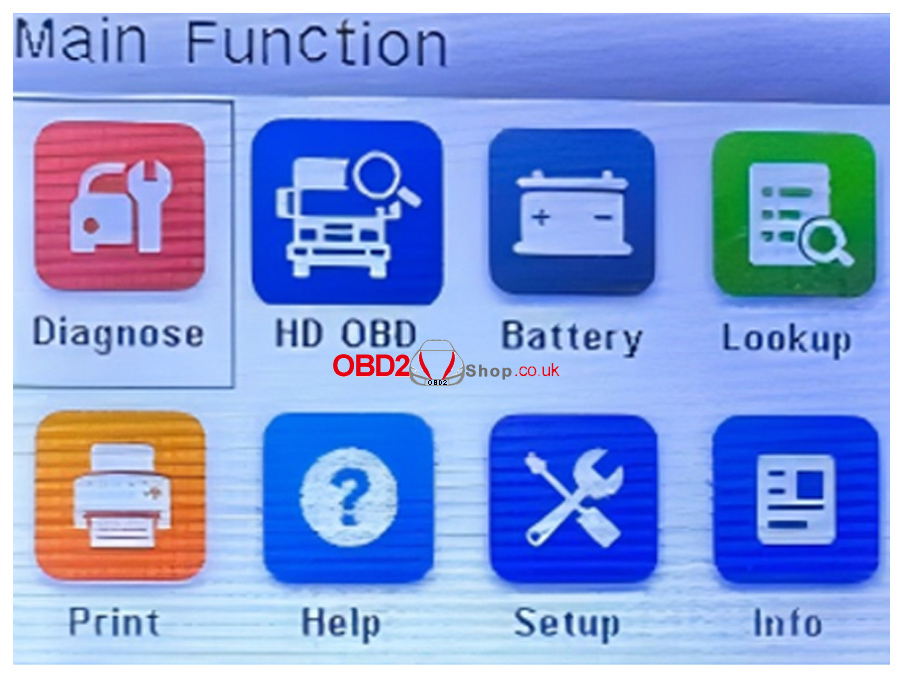
1. Diagnose (Passenger Vehicle OBD Diagnostics)

Supports mainstream global automotive communication protocols, ensuring seamless compatibility.
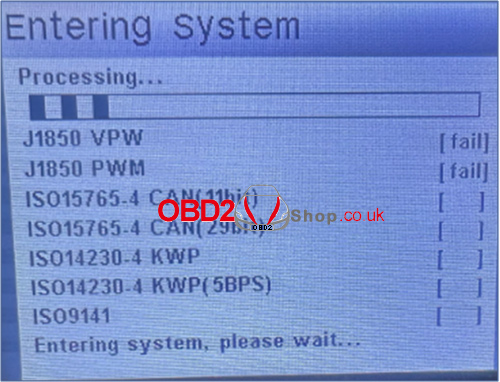
2. HD OBD (Heavy Truck OBD Diagnostics)
Dual-Mode Intelligent Diagnostics
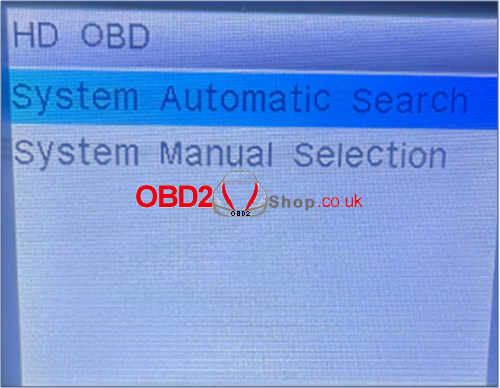
Automatic System Search: Automatically identifies vehicle communication protocols with a single click, quickly establishing a connection for high efficiency and convenience.
Manual System Selection: Supports professional personnel manually specifying the system to handle special or complex vehicle models, providing more accurate and flexible diagnosis.
3. Battery (Battery Check)
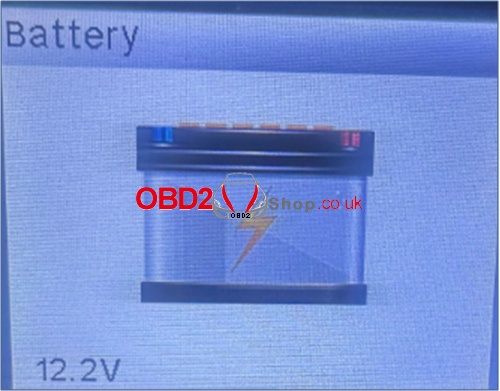
Read battery voltage from the OBD port
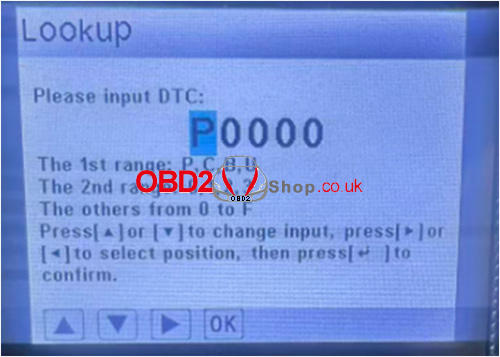
4. Lookup (Fault Code Lookup) One-click accurate diagnosis, fault code lookup

① Enter the fault code → ② Adjust the characters according to the prompts → ③ Press [OK] to confirm the lookup
5. Print

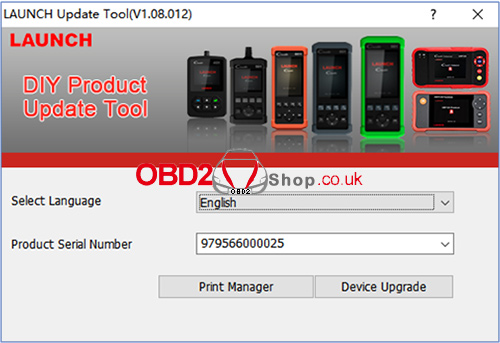
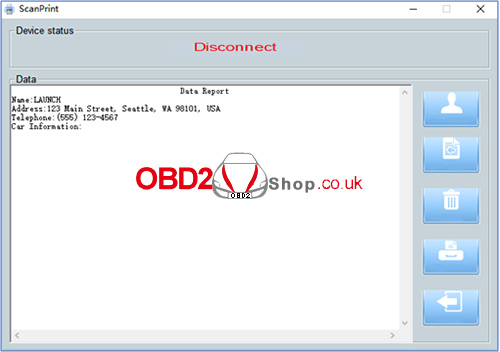
Open the upgrade client, select [Print Manager], and then print the diagnostic report.
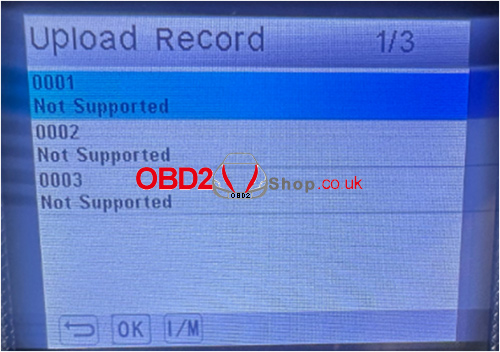
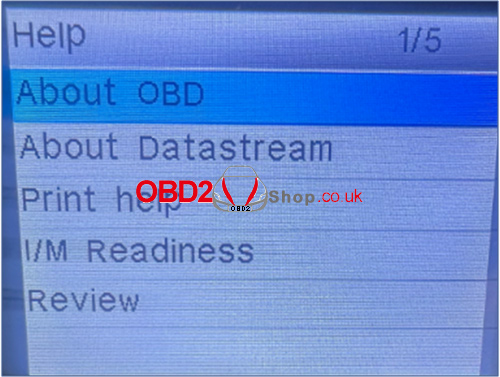
6. Help

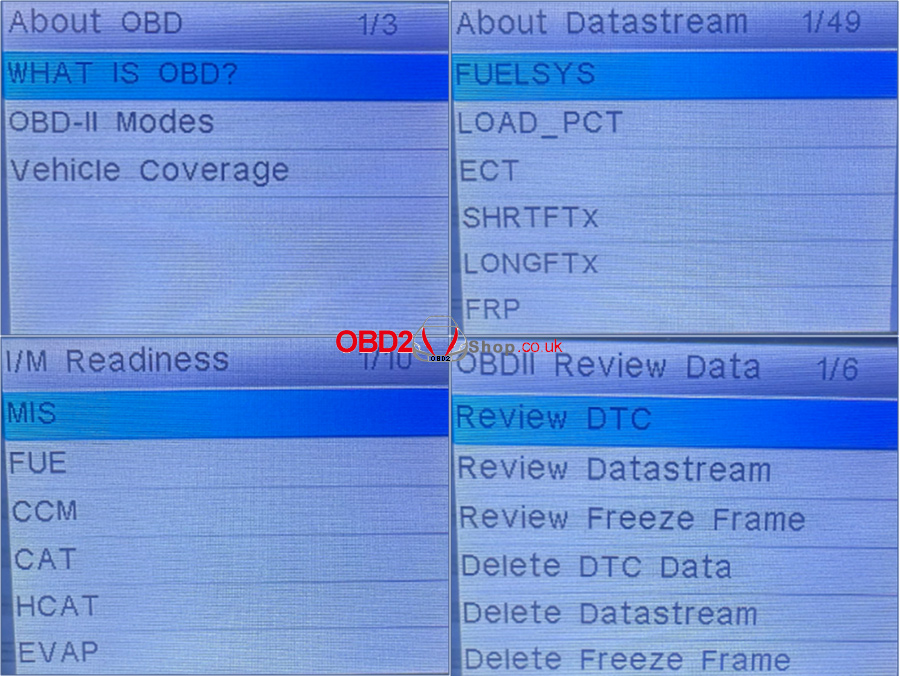
OBD-related definitions; Data flow terminology definitions; I/M readiness state terminology definitions; Viewing recorded data.
7. Setup
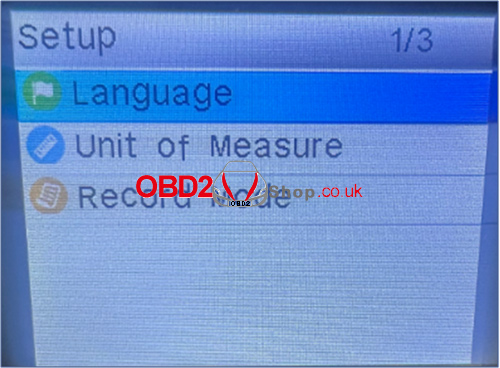
Language Switching: Supports three multilingual interfaces to meet the native language operation needs of users in different regions.
Unit of Measure: Allows for flexible unit settings to ensure data reading conforms to user habits.
Record mode: One-click enabling and disabling of recording mode.
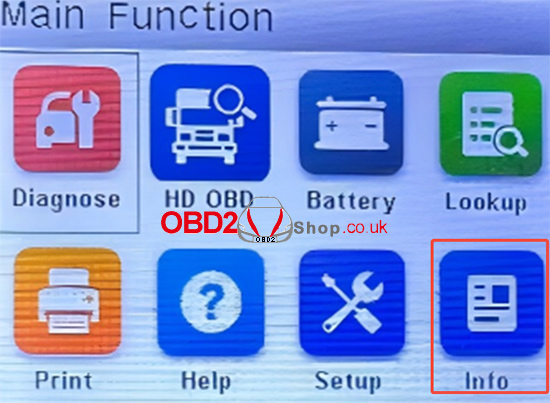
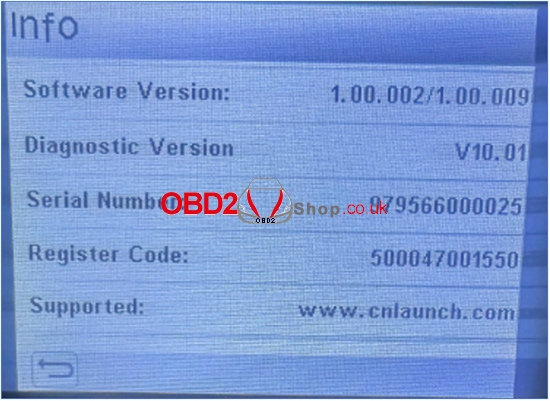
8. Info (Device Information)

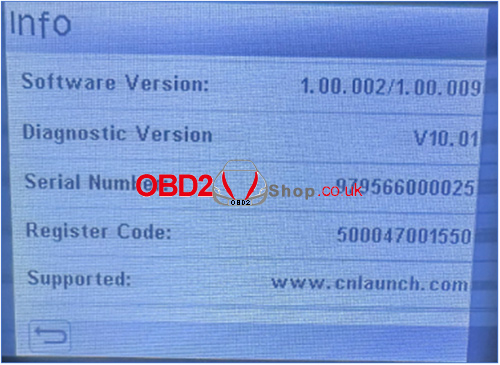
Software Version: The software version currently installed on the device.
Diagnostic Version: The firmware version currently installed on the device.
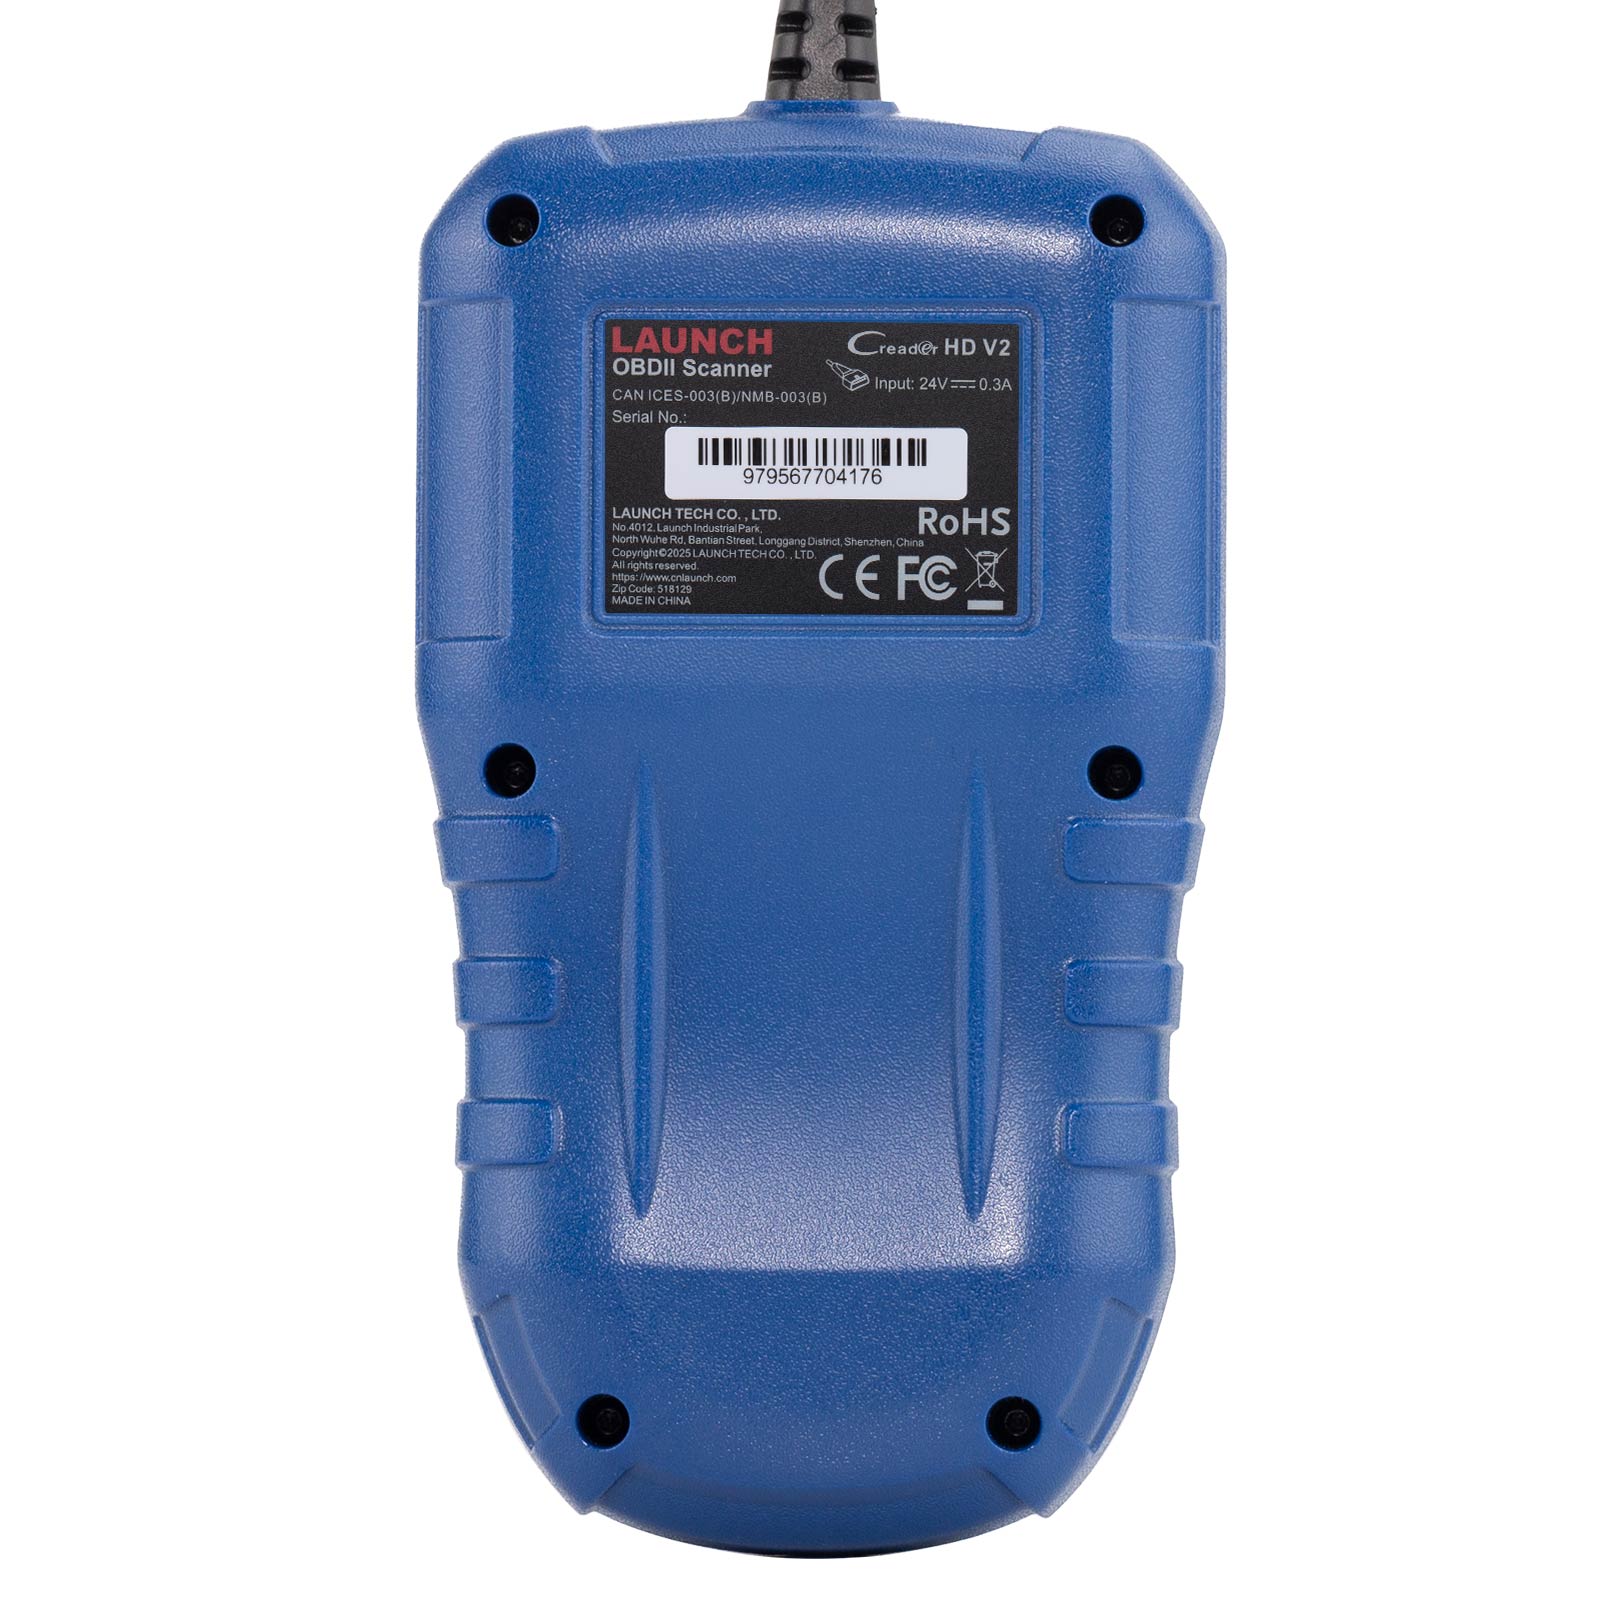
Serial Number
Register Code
Supported: Official Support Channels
1. Diagnose (Passenger Vehicle OBD Diagnostics)
Supports mainstream global automotive communication protocols, ensuring seamless compatibility.
2. HD OBD (Heavy Truck OBD Diagnostics)
Dual-Mode Intelligent Diagnostics
Automatic System Search: Automatically identifies vehicle communication protocols with a single click, quickly establishing a connection for high efficiency and convenience.
Manual System Selection: Supports professional personnel manually specifying the system to handle special or complex vehicle models, providing more accurate and flexible diagnosis.
3. Battery (Battery Check)
Read battery voltage from the OBD port
4. Lookup (Fault Code Lookup) One-click accurate diagnosis, fault code lookup
① Enter the fault code → ② Adjust the characters according to the prompts → ③ Press [OK] to confirm the lookup
5. Print
Open the upgrade client, select [Print Manager], and then print the diagnostic report.
6. Help
OBD-related definitions; Data flow terminology definitions; I/M readiness state terminology definitions; Viewing recorded data.
7. Setup
Language Switching: Supports three multilingual interfaces to meet the native language operation needs of users in different regions.
Unit of Measure: Allows for flexible unit settings to ensure data reading conforms to user habits.
Record mode: One-click enabling and disabling of recording mode.
8. Info (Device Information)
Software Version: The software version currently installed on the device.
Diagnostic Version: The firmware version currently installed on the device.
Serial Number
Register Code
Supported: Official Support Channels
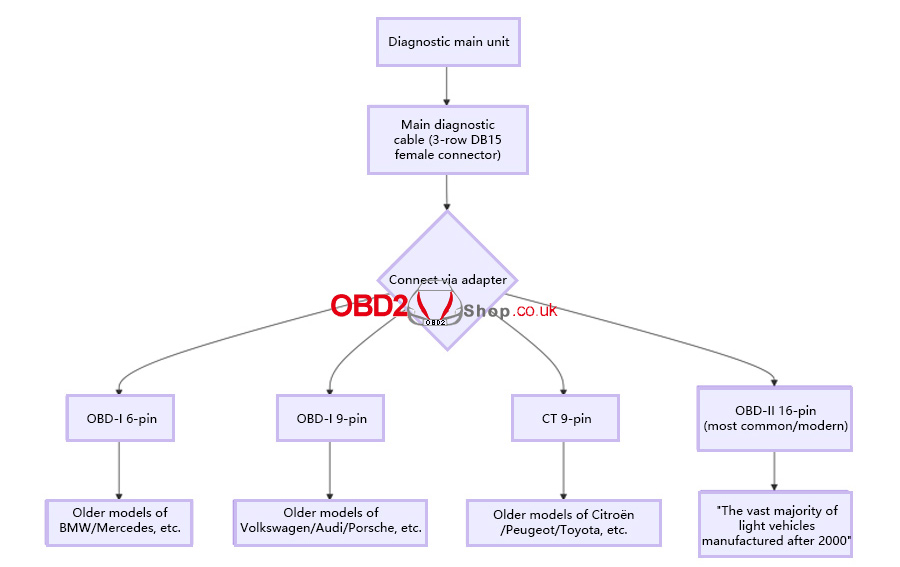
Vehicle Diagnostic Interface Working Diagram:
Quick Connection and Diagnostic Operation Steps:
1. Connection Steps
• First, turn off the ignition switch and ensure the vehicle is in a safe state;
• Next, locate the DLC (Data Connector) – usually located under the steering wheel or on the driver's side dashboard;
• Next, select and install the appropriate adapter according to the vehicle's DLC type;
• Then, connect the diagnostic cable to the vehicle's DLC via the adapter;
• Finally, turn on the ignition switch (the engine can be off or running) and start the diagnostic system.
2. Diagnostic Operation
• Connecting the Device: Connect the diagnostic tool to the vehicle's DLC, turn on the ignition switch, and the device will start automatically;
• Entering the Main Interface: After the system recognizes the vehicle, it will enter the main function screen;
• Selecting a Function: Select fault code lookup, data logging, playback, or auxiliary functions as needed;
• Following the Prompts: Follow the on-screen instructions to complete the test; simple and efficient.
Launch CR HD V2 Specifications:
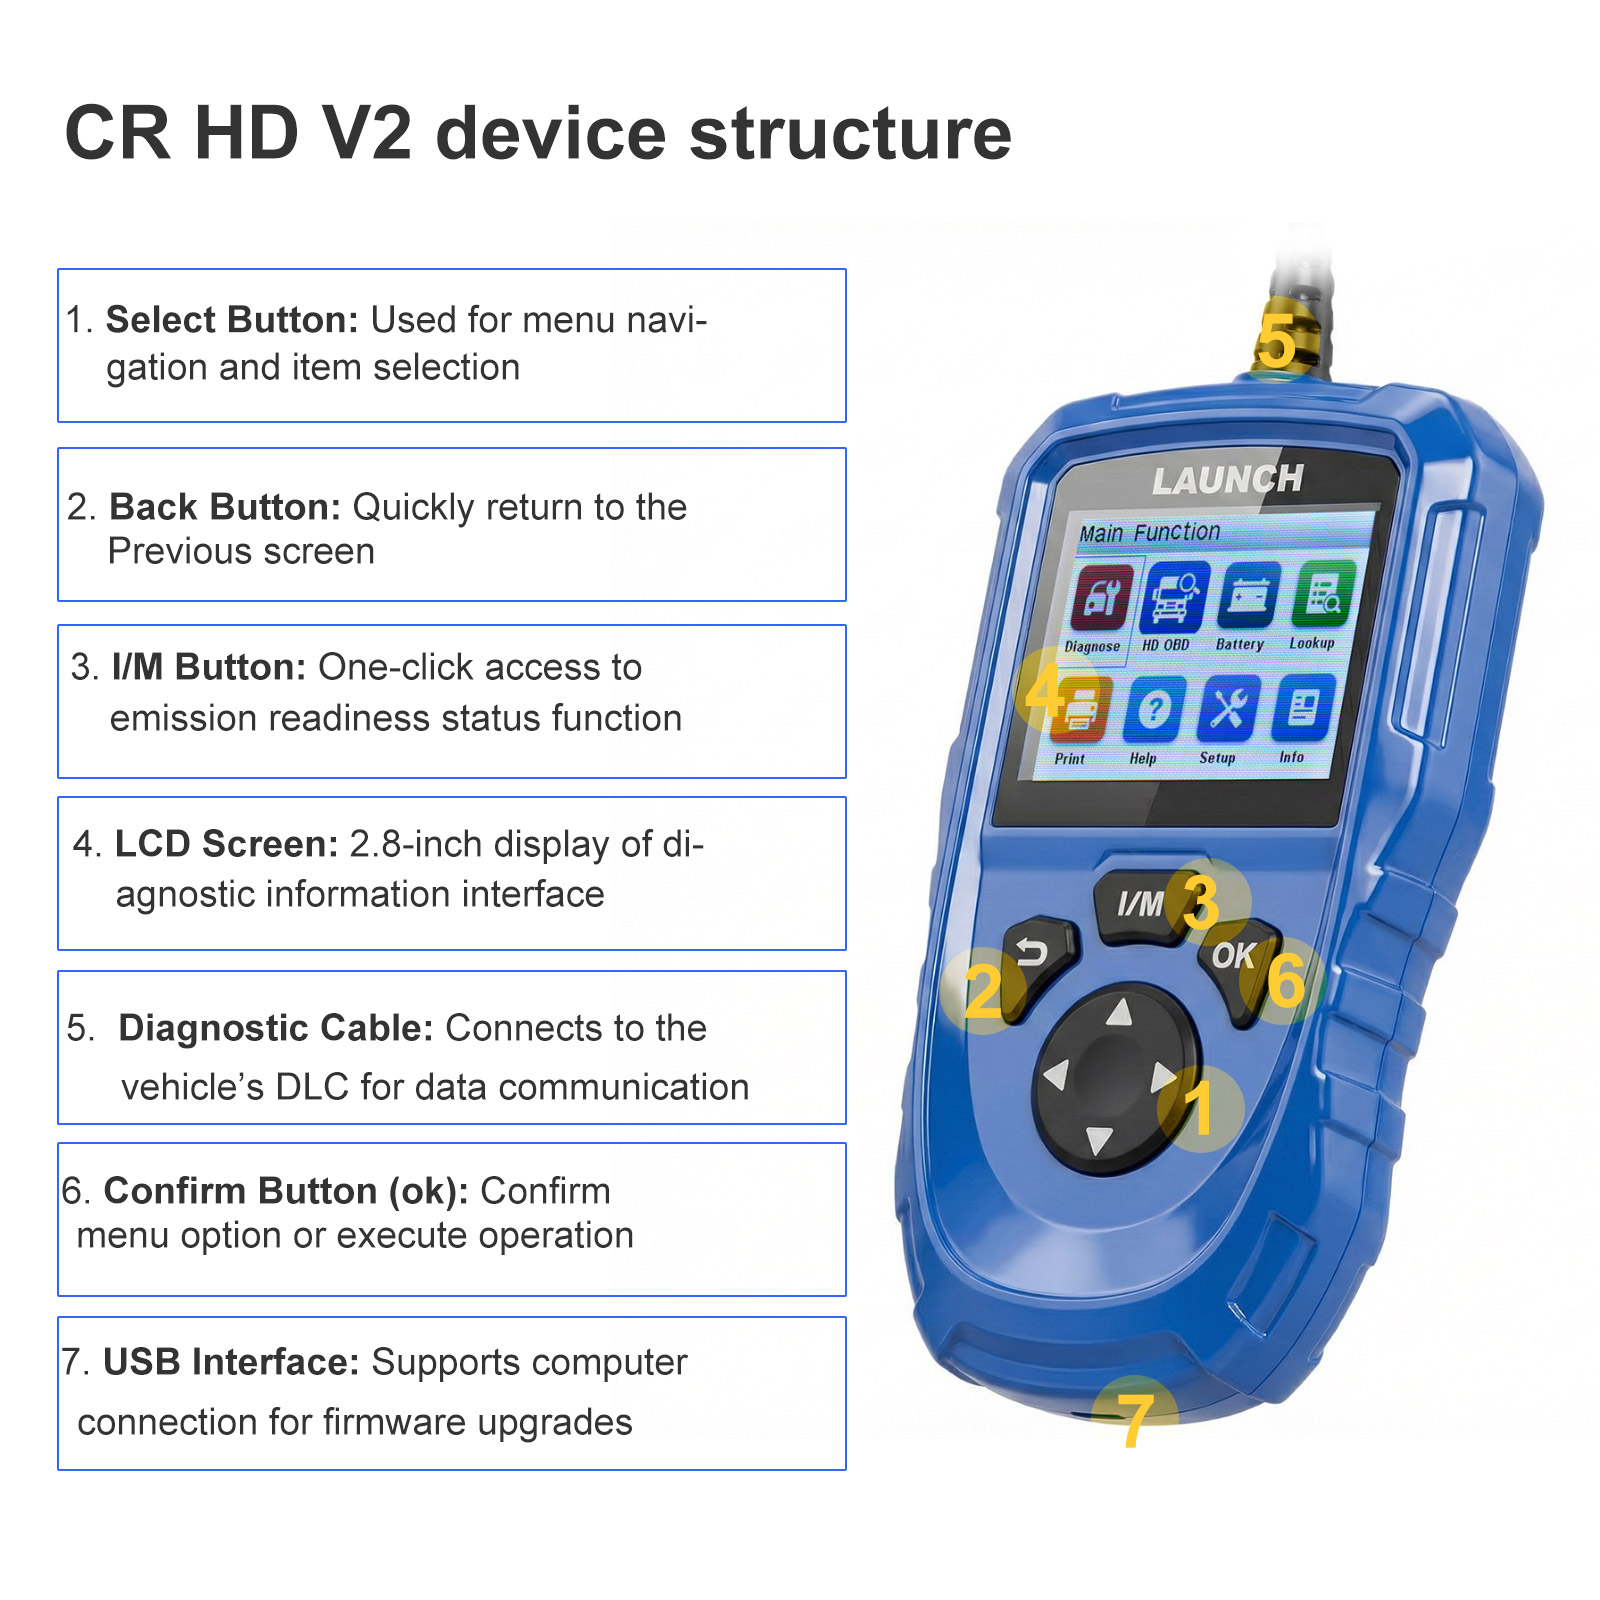
Screen: 2.8 inch
Storage: 16MB
Interfaces: 1. OBDII (direct output); 2. Type-C
Voltage: 24V
Operating Current: 0.25A
Operating Temperature: 0℃~-50℃
Storage Temperature: -20℃~-70℃
Buttons: Up, Down, Left, Right, Confirm, Back, I/M
Certifications: CE, FCC, IC, RoHS
Languages: English, French, Spanish
Service: Upgrade package obtained via PC client connection, permanently valid.
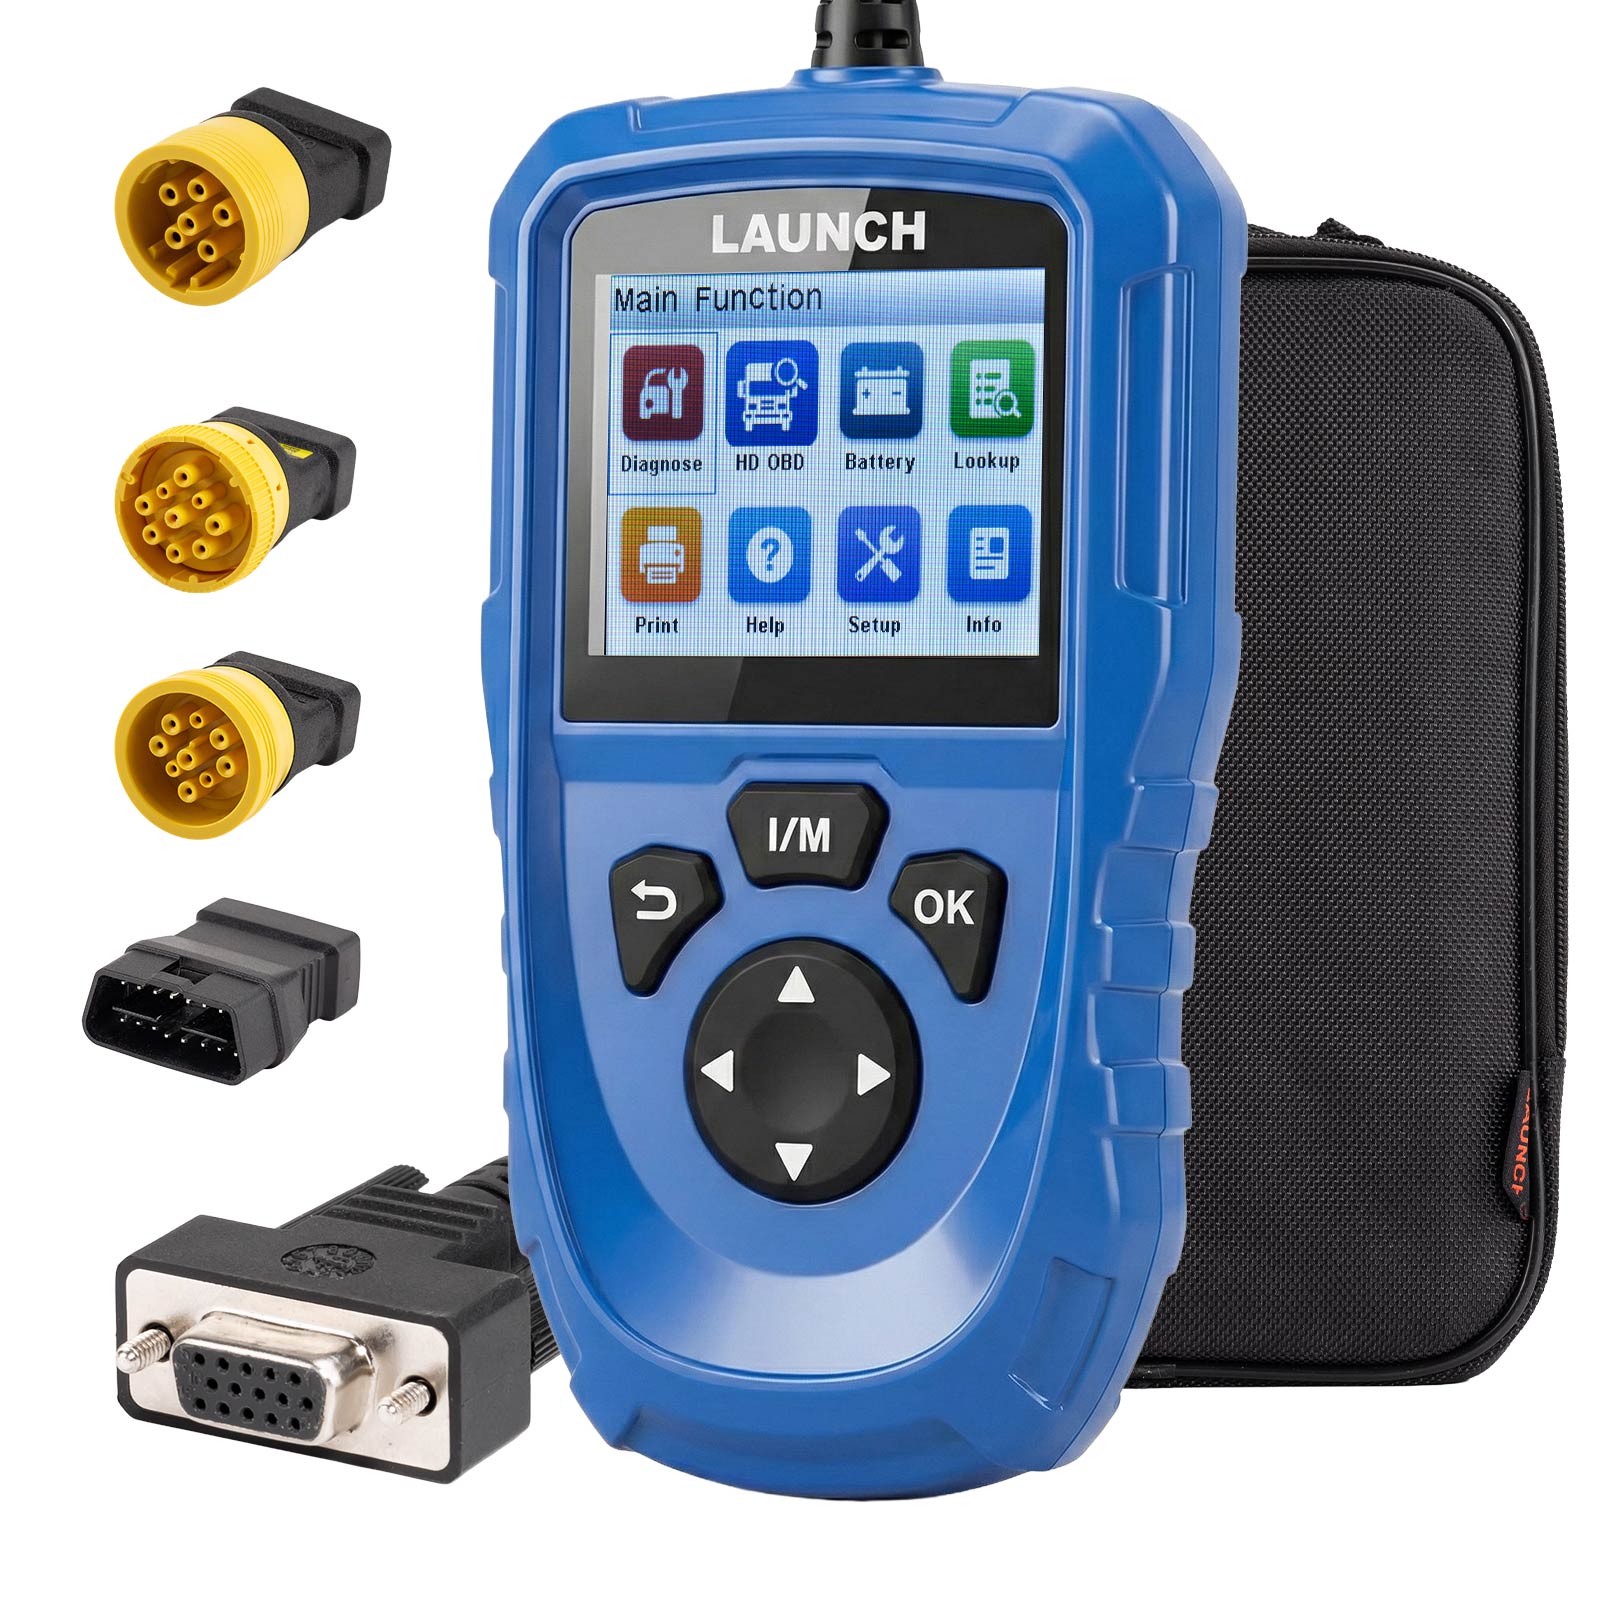
Launch CR HD V2 Package List:
1pc x Main unit with diagnostic cables (3-row DB15 female connectors (1.5m cable))
1pc x OBD6 connector,
1pc x OBD9 connector,
1pc x CT9 connector,
1pc x adapter connector
1pc x Quick Start Guide
1pc x Cloth bag
1pc x OBD6 connector,
1pc x OBD9 connector,
1pc x CT9 connector,
1pc x adapter connector
1pc x Quick Start Guide
1pc x Cloth bag


Hot Branded Products:










Shipping method and delivery time:
UK Shipping (No Tax) : 2-4 working days arrive. For products marked " UK Ship " and UK local customer
EU shipping (No Tax) : 5-7 working days arrive. For products marked " EU Ship " and from EU countries, if not belong to EU, need to clearance
Yodel (No Tax) : 5-7 days arrive . For products UK out of stock, and customers from UK
Yun Express ( No Tax) : 5 - 9 working days to UK, 7-14 days to other European Countries.
Yanwen (No Tax) : 5 - 9 working days to UK, 7-14 days to other European Countries, ship to all over the world, mainly for UK/EU warehouse no stock
DHL: need to clearance, 3-5 working days arrive. Used for UK/EU no stock, customers request ship this way. Need to clearance, we will declare a low price on the invoice help to clearance.
If you have any questions about the device, the price, or the payment, please feel free to contact us.
Contact Person: Elyza
Whatsapp: +86 13983755934
Telephone: +86 13983755934
Wechat: +86 13983755934
Official Email: Sales@obd2shop.co.uk

Tech Support
Keeping your Launch CR HD V2 diagnostic device updated is essential for optimal performance, enhanced vehicle compatibility, and access to the latest features. Follow this step-by-step guide to safely download and install the latest software using the official Launch upgrade tool.Step 1: Download the DIY Integration Upgrade Tool
Open your web browser and navigate to the official Launch download portal:
https://en.cnlaunch.com/download/
On the download page, locate and select the option for the DIY Integration Upgrade Tool.
Click the Download button to save the installer to your computer.

Step 2: Install and Launch the Upgrade Tool
Run the downloaded installer and follow the on-screen instructions to complete the installation.
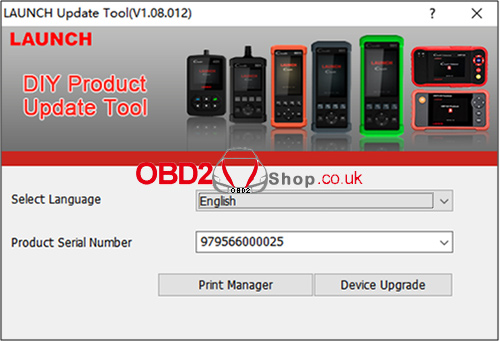
Open the newly installed DIY Integration Upgrade Tool client on your computer.
Choose your preferred language (the default is set to English).
Enter the Serial Number of your CR HD V2 device.
Click the Device Upgrade button to proceed.
Step 3: Enter Your Device Registration Code
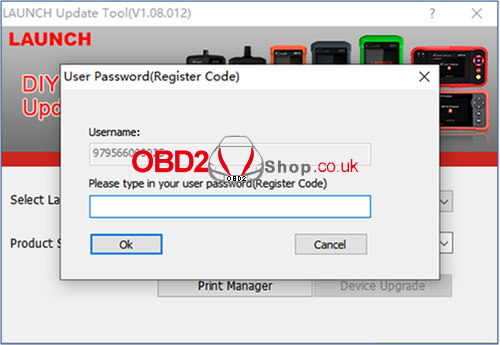
The upgrade tool will prompt you for a Registration Code.
On your CR HD V2 device, navigate to:
Function Homepage → Info → Register Code
Carefully enter the registration code displayed on your device into the corresponding field in the upgrade tool on your computer.
Step 4: Select and Install Updates
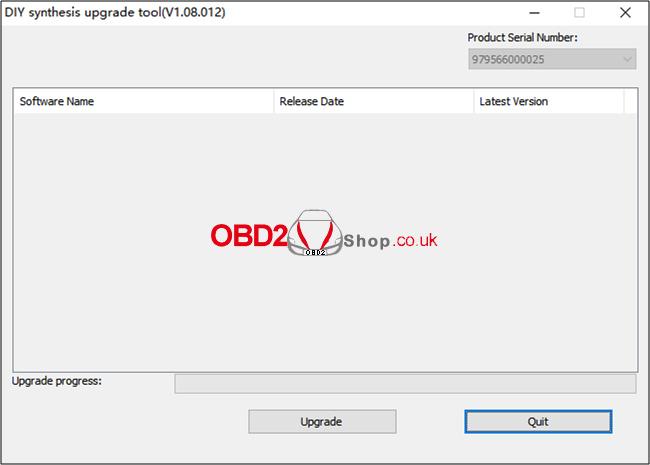
After successful verification, the tool will display a list of available software updates for your device.
Select the updates you wish to install.
Note: If your device software is already current, this list may be empty.
Click the Upgrade button to begin the installation process. Do not disconnect your device until the update is fully complete.
For a wide range of diagnostic tools, accessories, and support, visit:
www.obd2shop.co.uk